

If you’re looking for a comprehensive guide on how to sell tickets for your events in person with Shopify POS and Evey Events, then look no further! In this blog post, we’ll walk you through the entire process step-by-step so that you can start selling tickets right away.
Let’s get started!

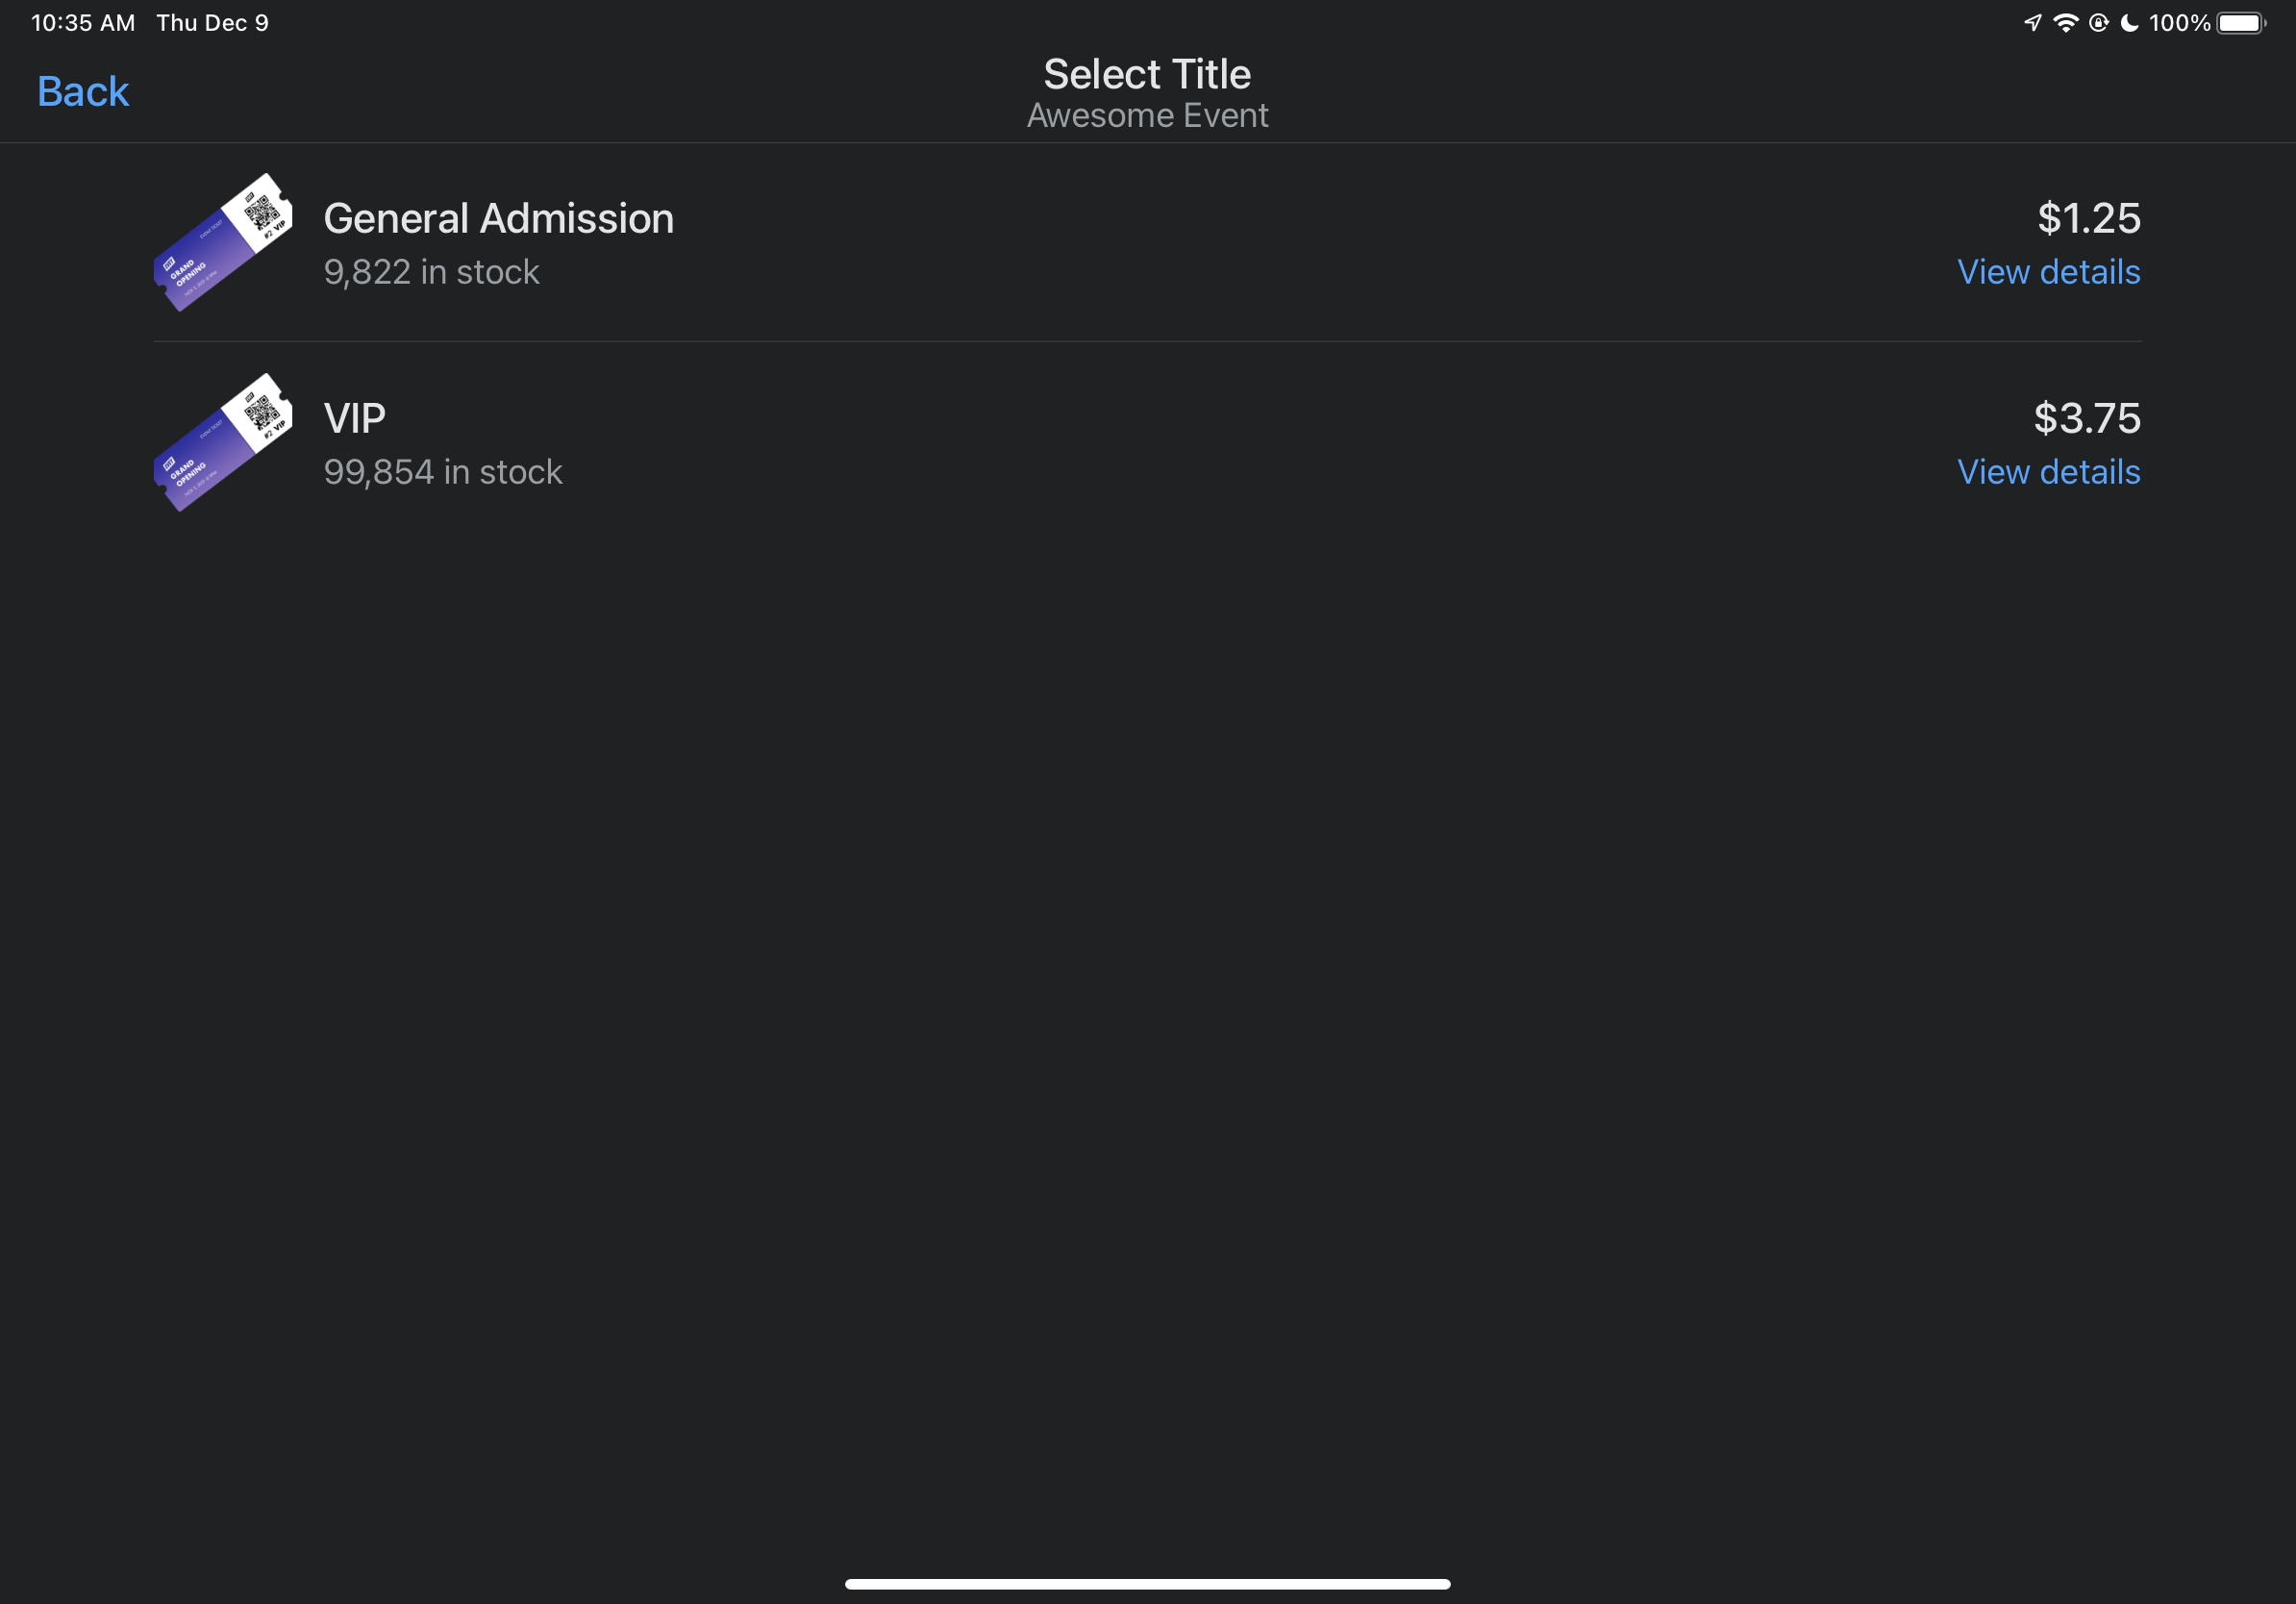
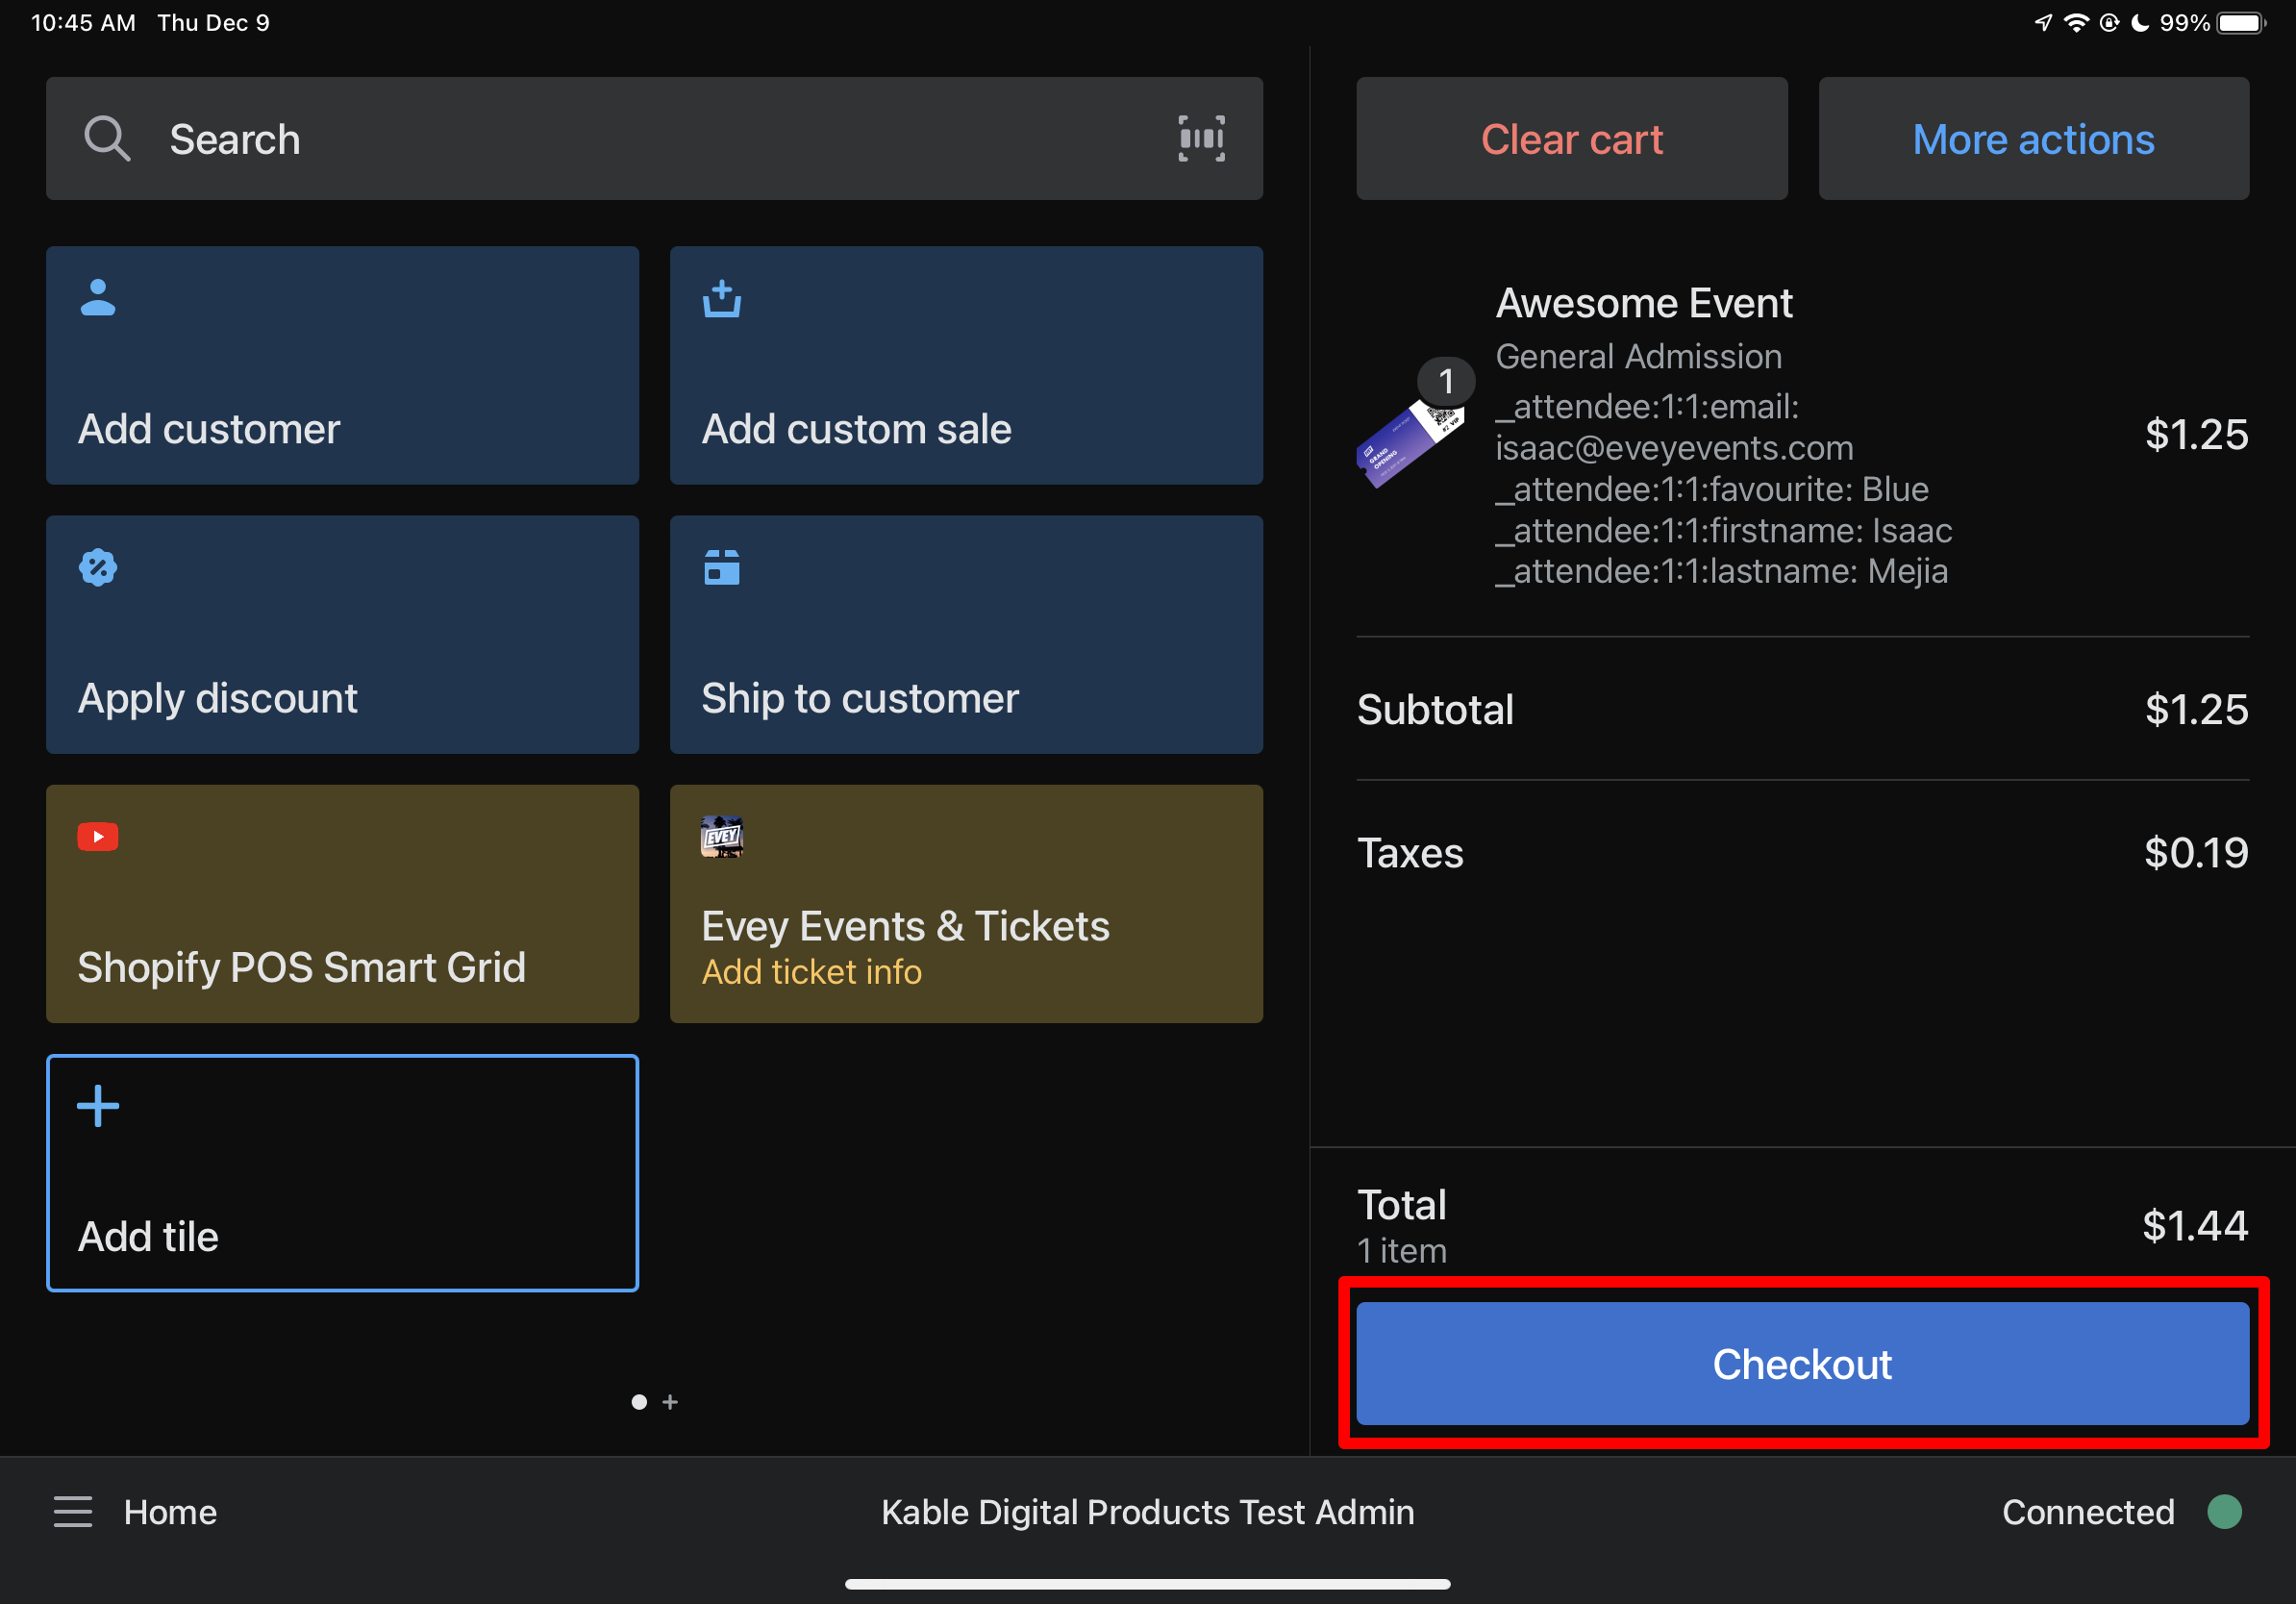
The first step is to add the product to the cart: you can do so by searching for the product in your POS and, once found, choosing the ticket type you want to sell. Then, add it to the cart.
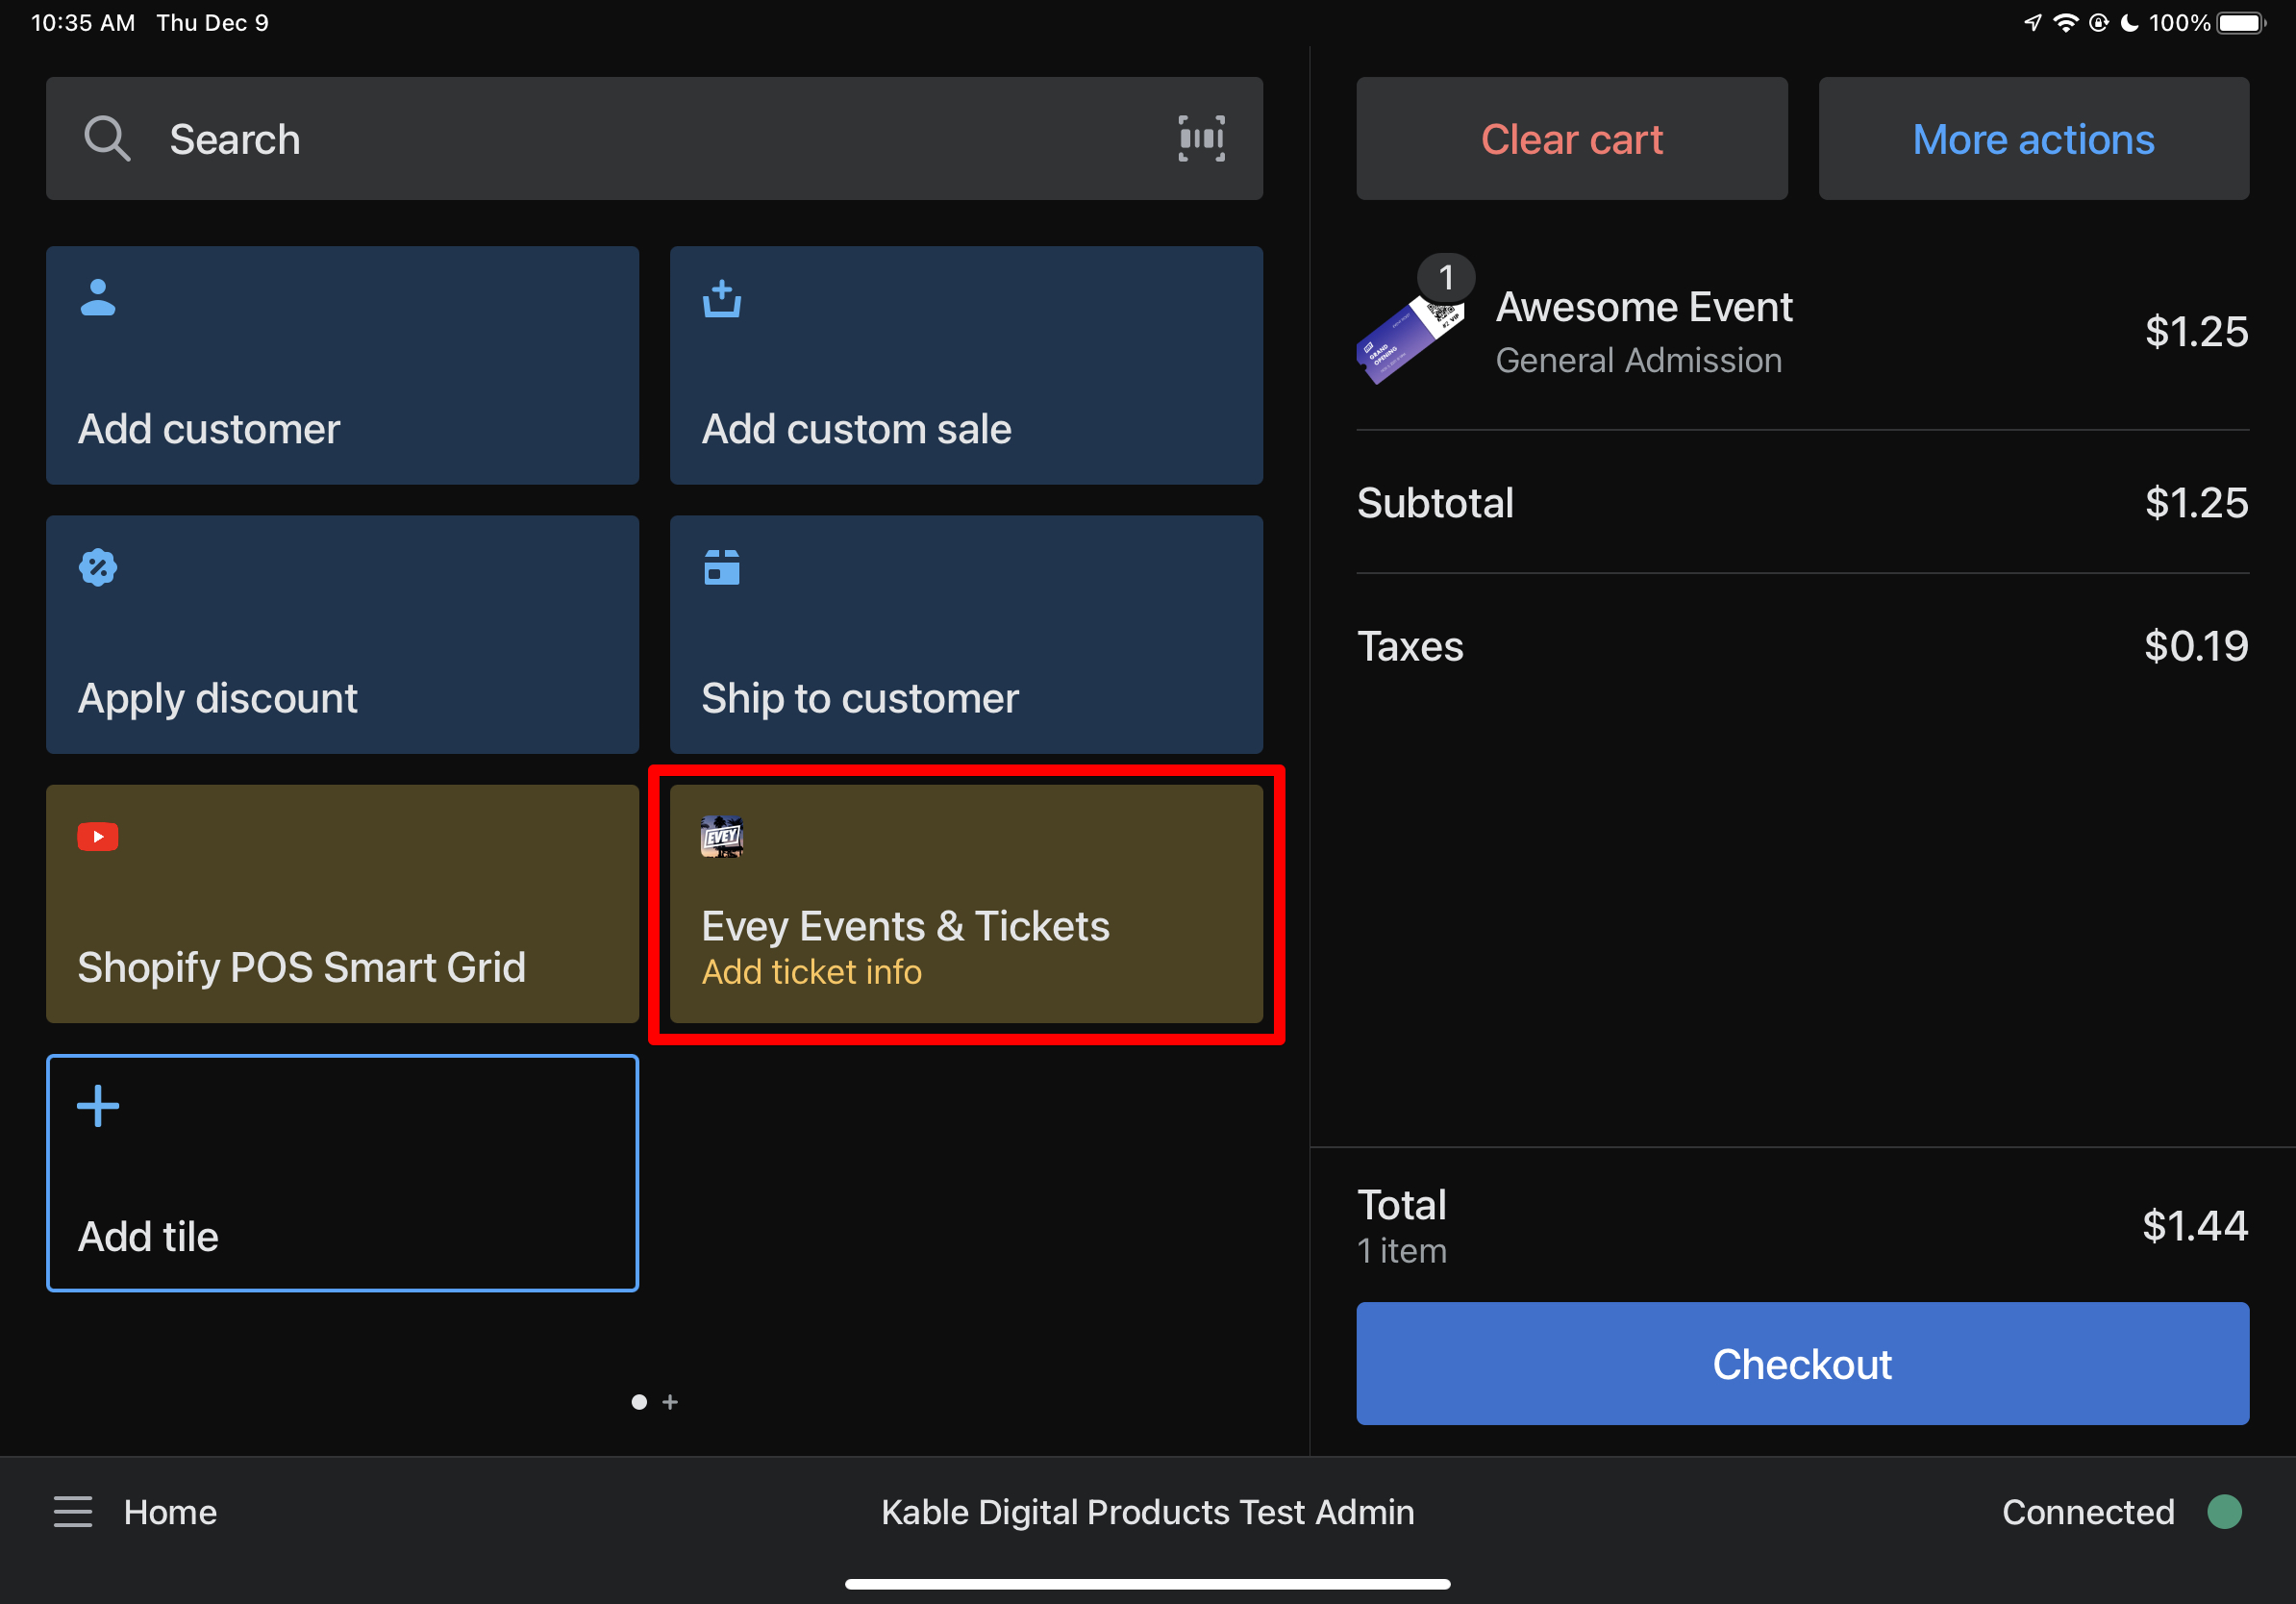
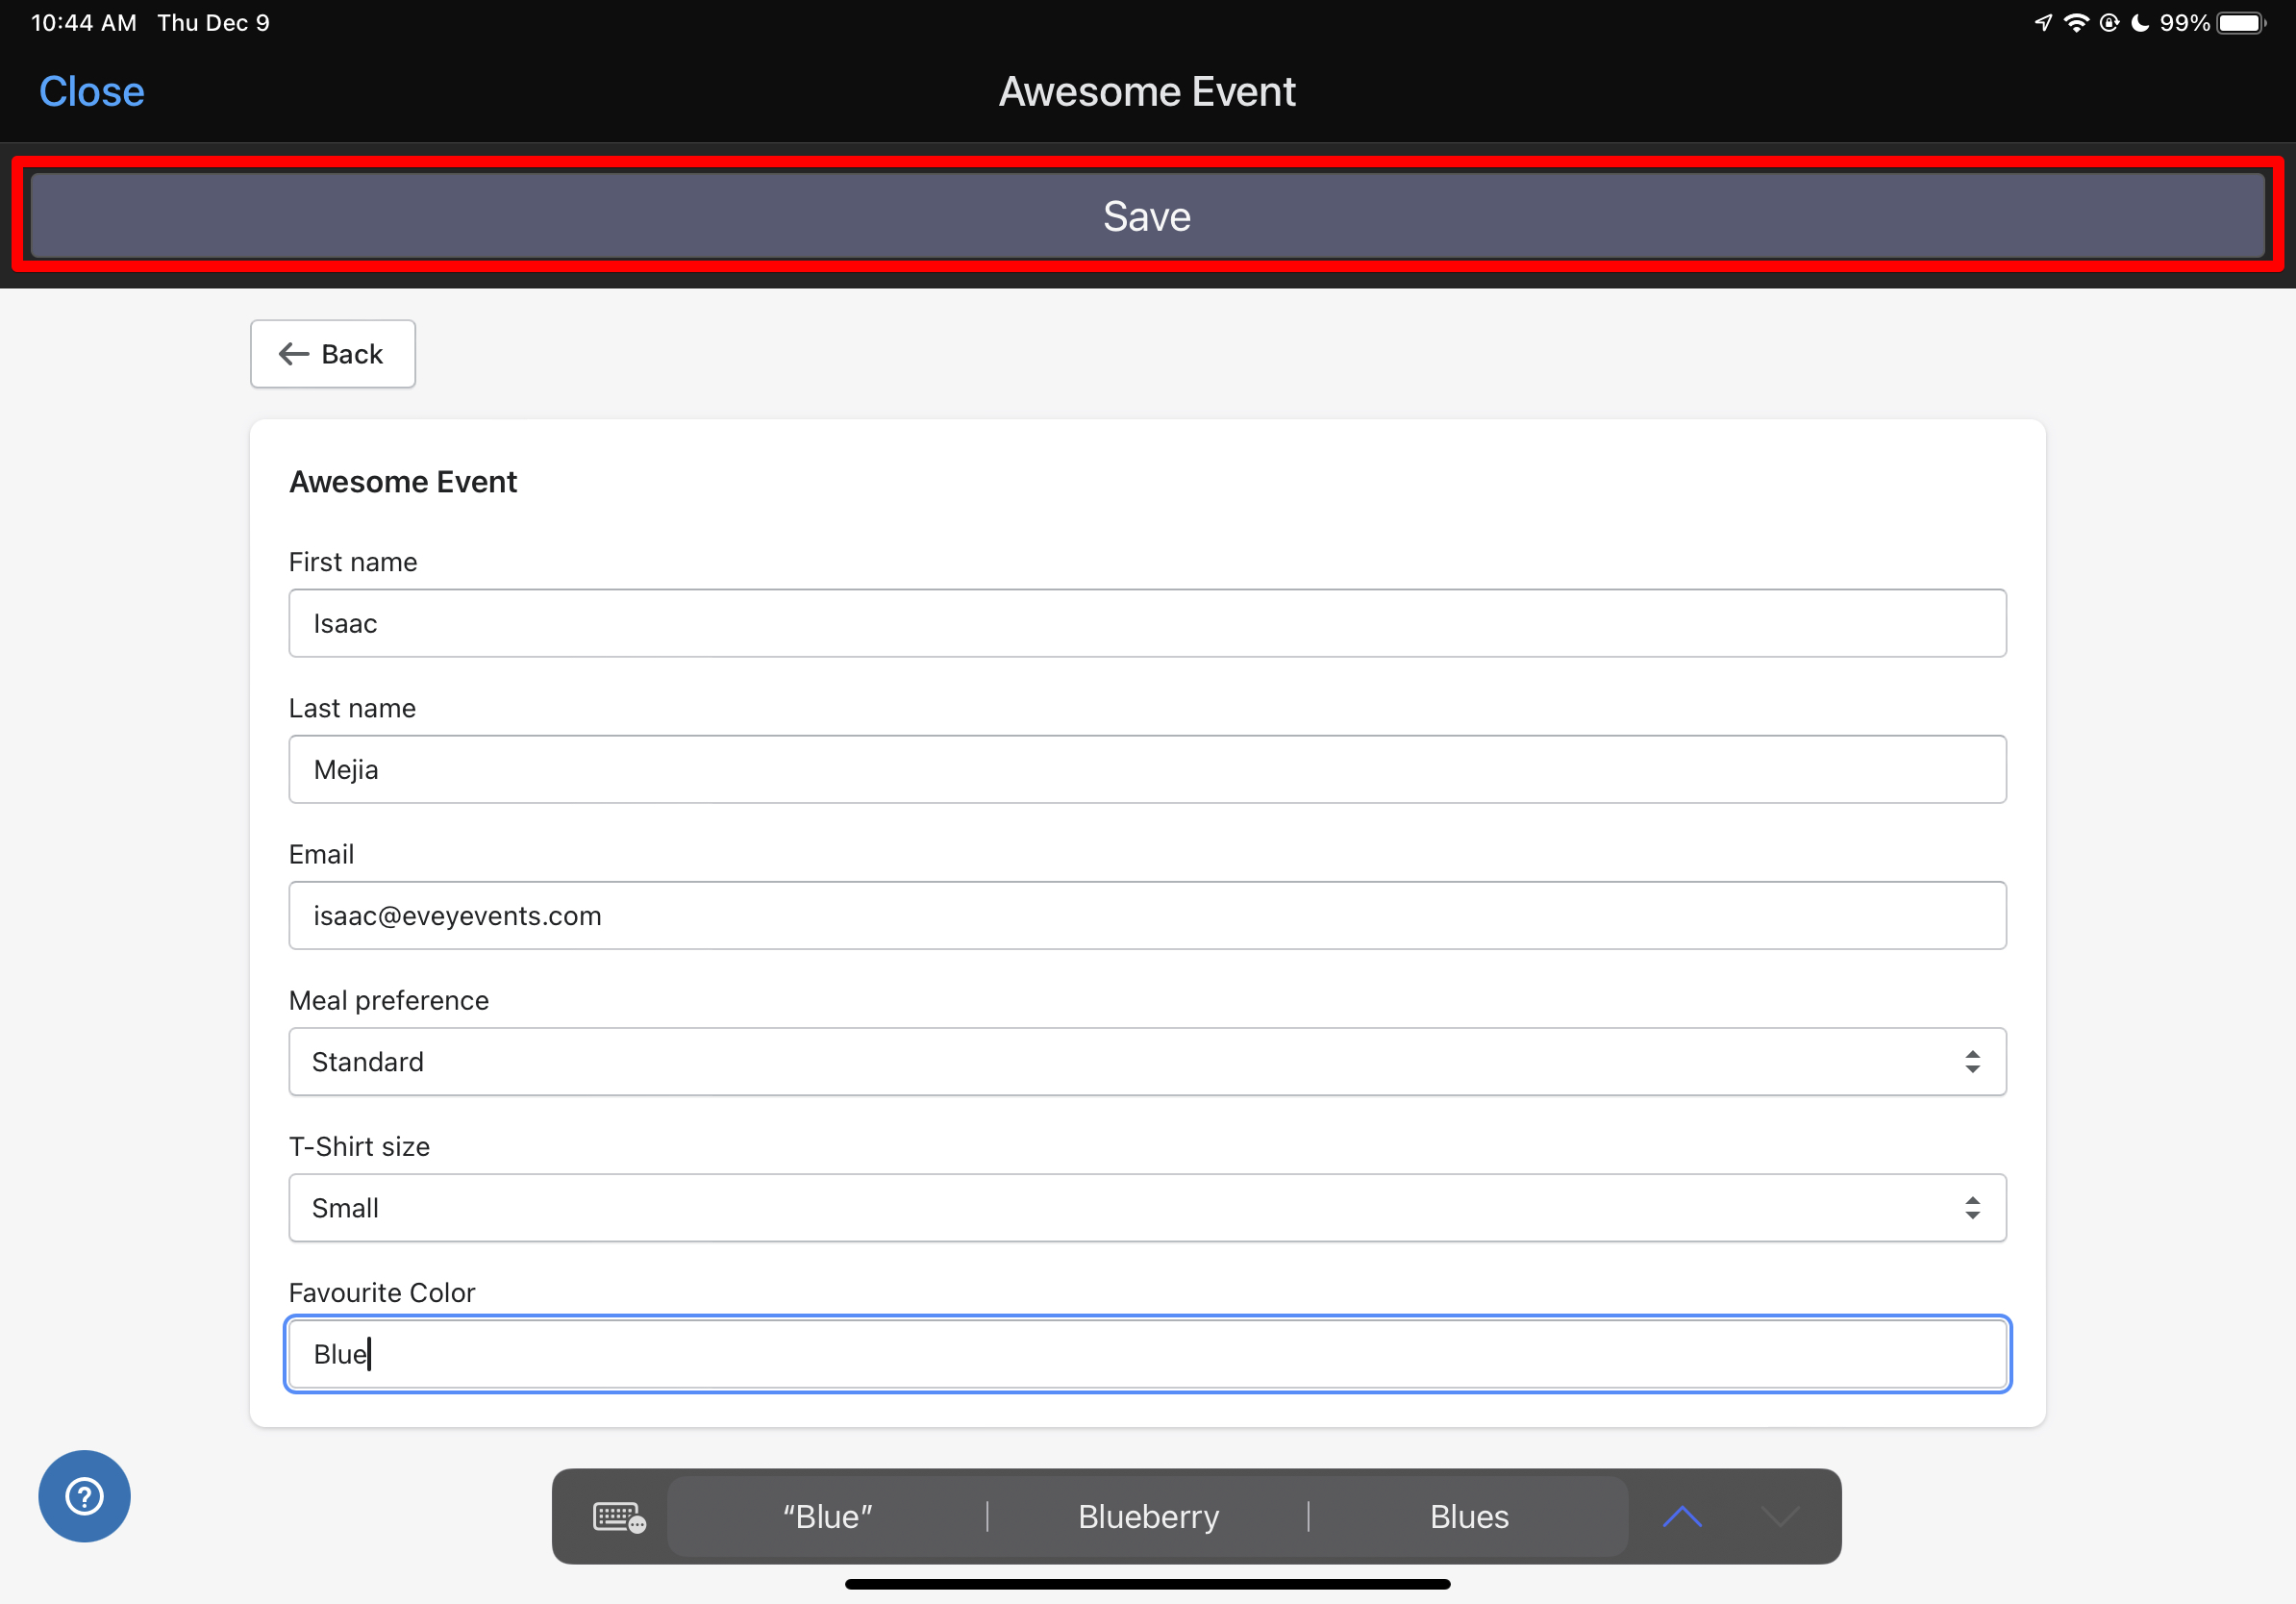
From there, you will see a tile on the POS for “Evey Events and Tickets”: this will give you the ability to provide additional details for the ticket before check-out. This is helpful for tickets that use information collection integration on your storefront, or for choosing a date/time for a recurring event. You’ll be shown all the tickets you have in the cart and can choose which ones you want to edit the information for. Once you have the information filled in, you can click save. When all the tickets are completed, you can click “Close” in the upper right hand corner which will take you back to the POS.
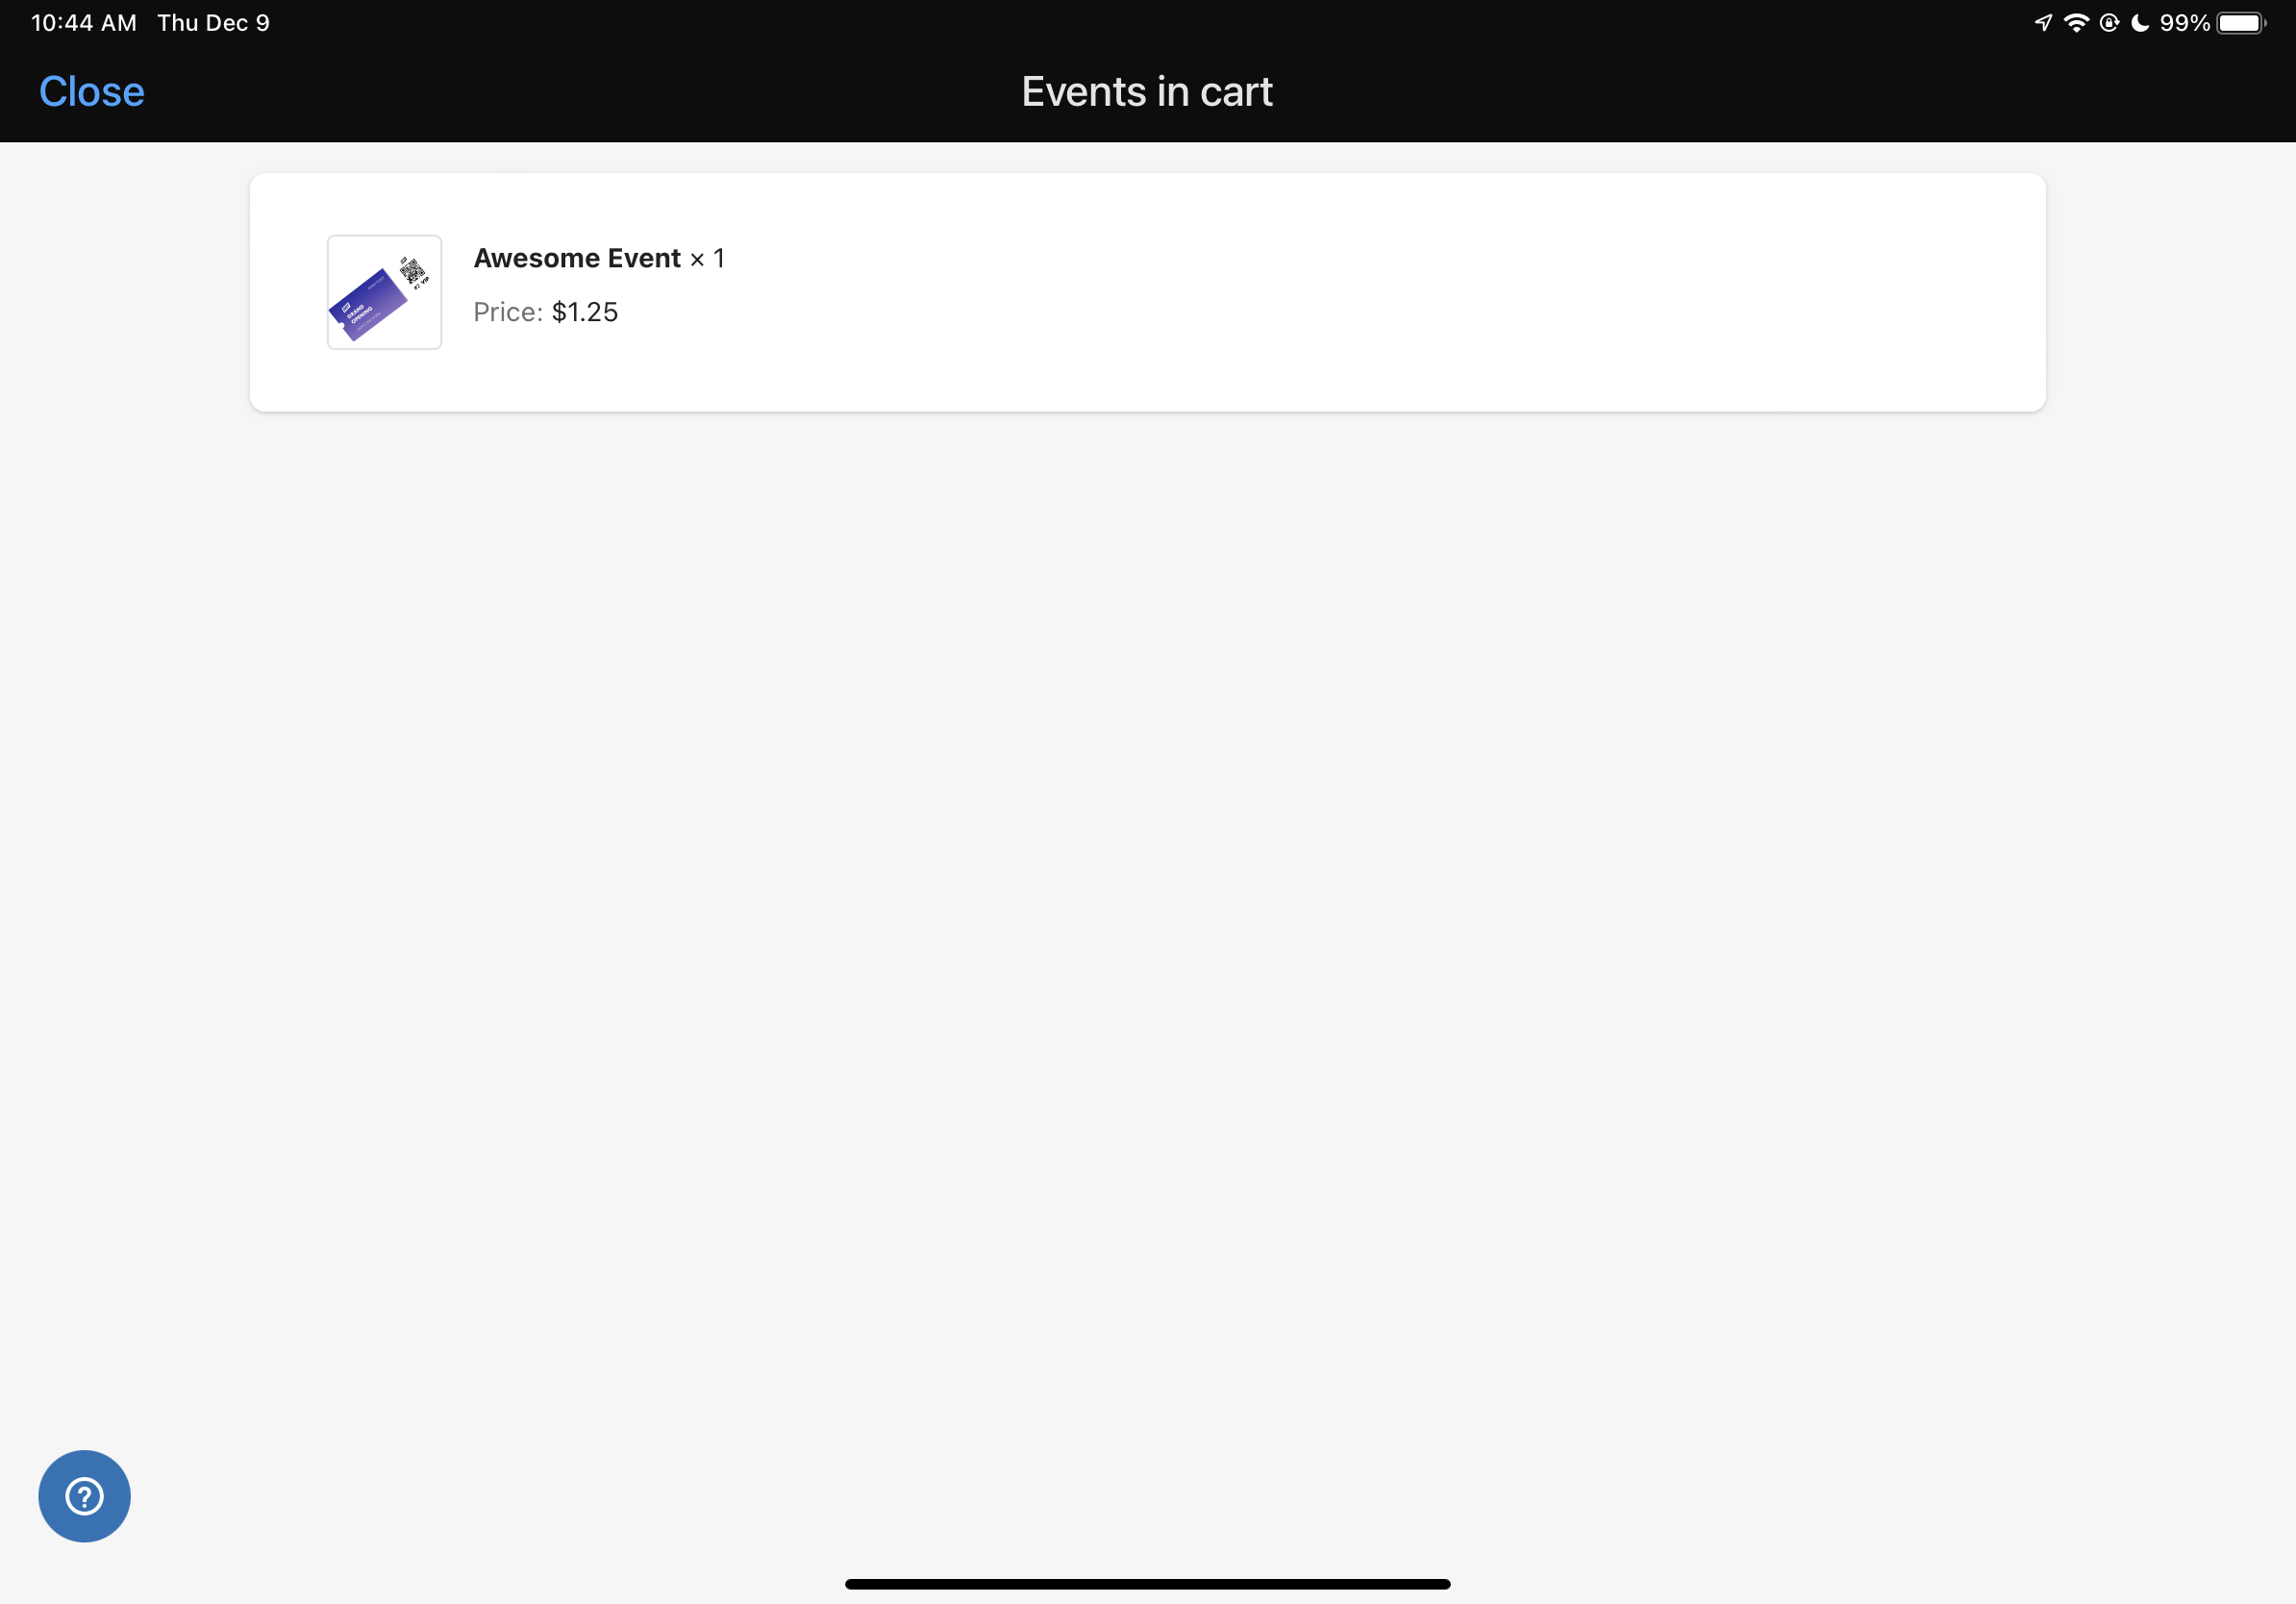
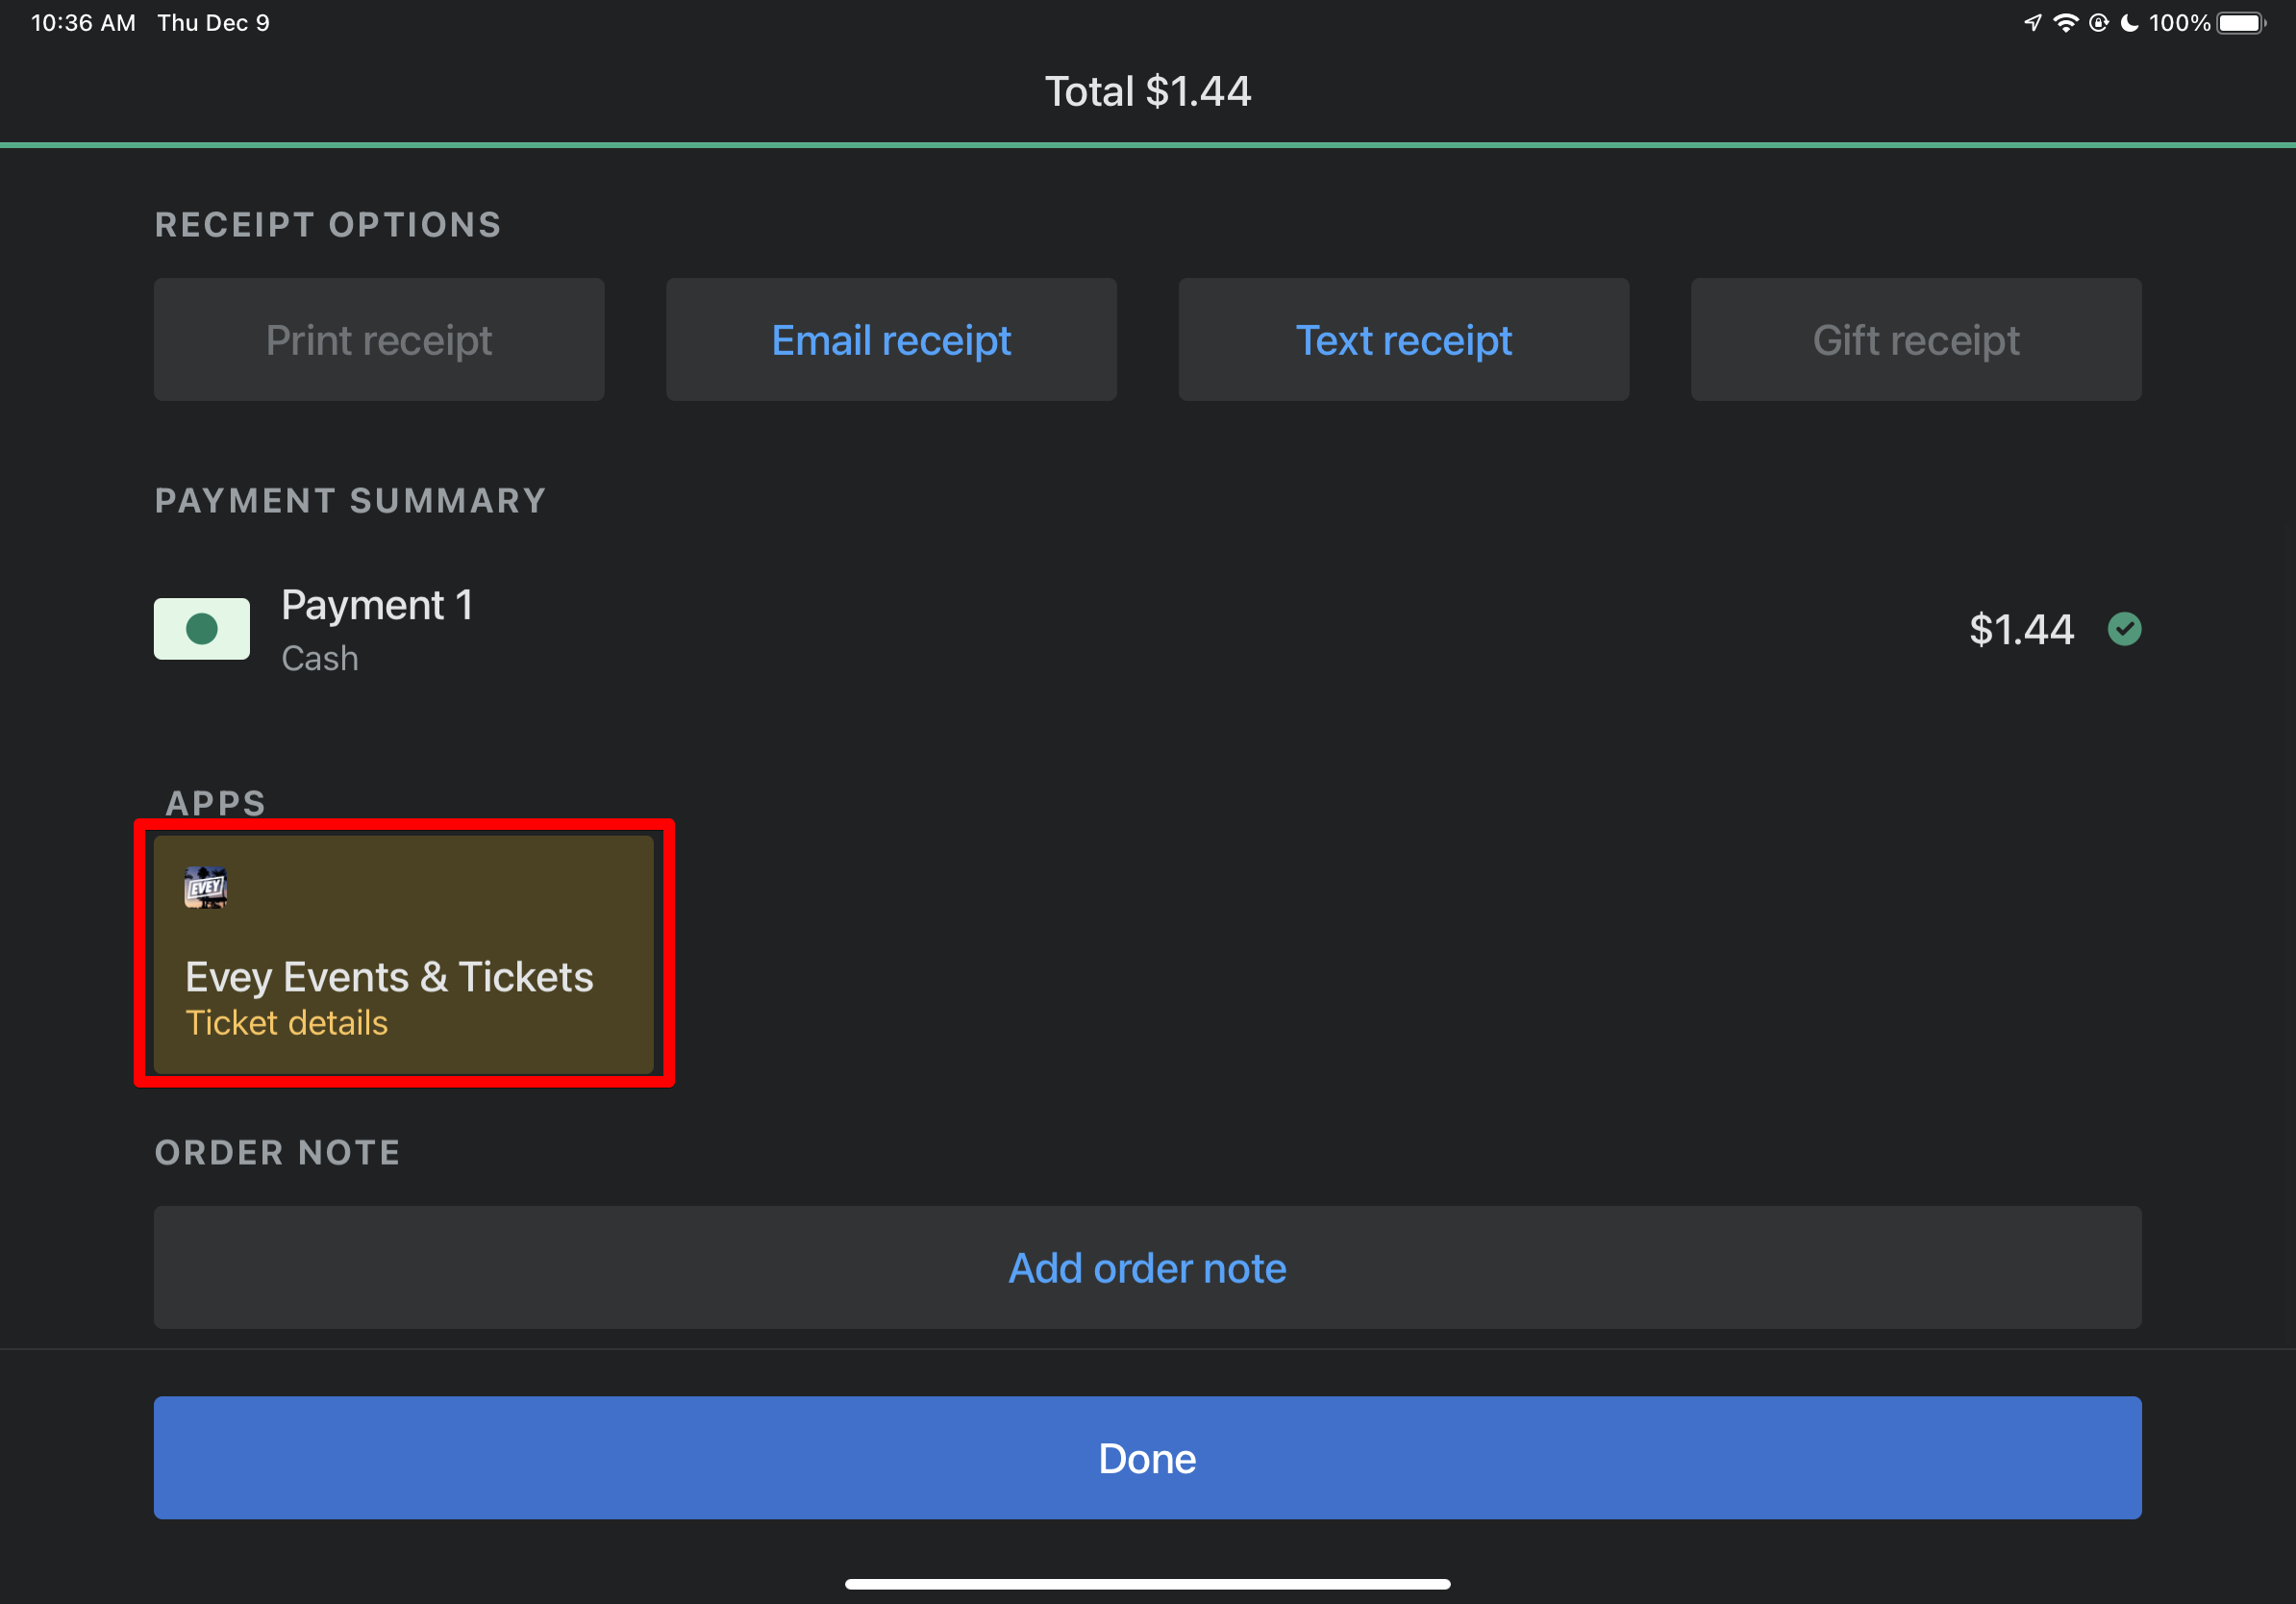
Once you’ve added the information to the ticket, you can click checkout and choose your payment method. When you get to the confirmation screen, you can scroll down and you will see the same tile you saw earlier for “Evey Events and Tickets”: clicking on this will bring up the information screen again but will now let you send the ticket to the attendee so they can use it for check-in. You can also choose to edit their information from here if needed. Make sure to click save before sending to update the information.

As always, if you have questions, please reach out to us anytime– our team is always happy to help!

